My 2017 precision rifle project based on the American Rifle Company Mausingfield is essentially completed, short of the break-in, load testing, and simply running the rifle. This segment of the series of articles on my Mausingfield project is mainly a compilation of prior range data into a general range report, and a commentary on my opinion of the rifle build as it stands now.
In Part 4 of the Mausingfield precision rifle project articles, I wrote about the very first rounds put through the rifle and how the factory Hornady 6mm Creedmoor 108gr ELD Match ammunition is too long for my chamber. Of course, since there is no true SAAMI specification for 6mm Creedmoor, there is a good chance a custom rifle build will run into this issue with factory ammunition.
In my case, I did inform my gunsmith that I would be shooting the Berger Bullets 6mm Hybrid Target and wanted the chamber optimized for this.
But what I ended up doing after the initial range session when I shot the first rounds through the gun, was (re)seating the bullets in the factory ammo approximately 0.033″ deeper. This allowed it to chamber without issue. I ended up firing a really nice 7-shot group at 100 yards.
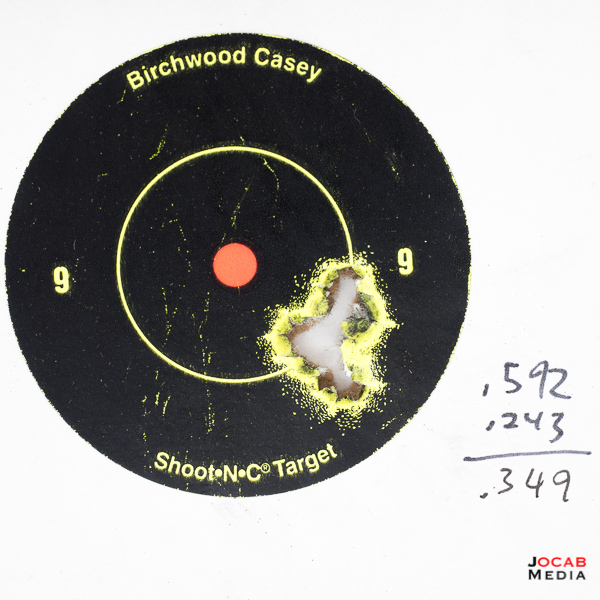
It is also important to note that my first batch of handloads were also seated too long. I used the Stoney Point (now Hornady) OAL comparator tool to determine the distance to lands, but it appears the tool is giving me false readings that I never experienced before in any of my previous rifles. I ended up going off of the base-to-ogive measurements of two handloaded cartridges that I chambered and unloaded without firing, and found these were set back to the same base-to-ogive length. I then adjusted my seater die to go under that reading by another five-thousandths of an inch (0.005″).
This resulted in handloaded cartridges that appear to function smoothly in the gun.
For the benefit of everyone interested in a 6mm Creedmoor chambering, this rifle’s chamber is cut with a 0.109″ freebore using the T26737 reamer made by Pacific Tool and Gauge for Grizzly Industrial. This is a lot shorter than the PT&G ‘standard’ 6mm Creedmoor reamer which is set for a 0.183″ freebore.
As far as continued development of the handloads, the initial data collected on the first range session has been negated because the barrel has sped up, so to speak.
In the sub-50 round count of the barrel’s young life, 41.0gr of H4350 pushed the Berger 105gr Hybrid 3058.89 fps. After 100 rounds, that same load averages 3085.33 fps. This is a muzzle velocity increase of ~26 fps.
Sub-50 round count, 41.3gr of H4350 pushed the Berger 105gr Hybrid 3078.39 fps. After 100 rounds, that same load averages 3106.59 fps. This is a muzzle velocity increase of ~28 fps.
I have keyed in on the above two loads because this is where I feel I will be loading for. It appears to be a good accuracy node to remain in.
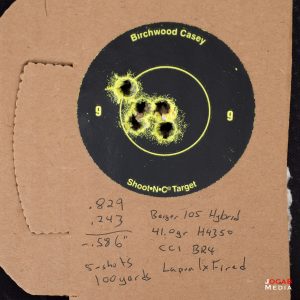
- 100 Yards
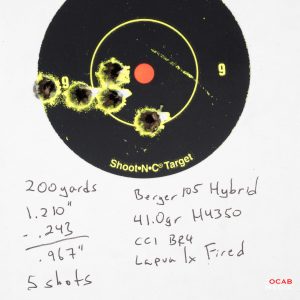
- 200 Yards
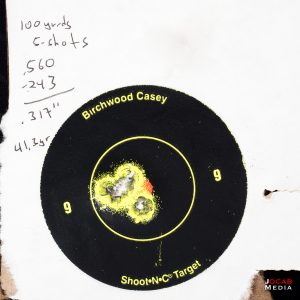
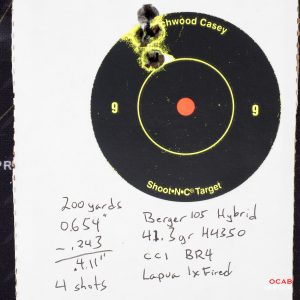
The Berger Bullets 105gr Hybrid Target and 41.0gr H4350 prints some decent groups on paper as seen in the above 100 and 200 yard test groups. It is hovering right around 1/2 MOA.
- 100 Yards
- 200 Yards
The above test groups are for 41.3gr H4350 behind the Berger 105gr Hybrid Target. As you can see, it can print under 1/3 MOA if you can hold the rifle still.
One observation in subsequent range sessions is the variance in muzzle velocity for a cold clean bore and a cold/cool fouled bore shot.
On one range session, the very first shot in the rifle with a clean and cold bore was 3029 fps. The next shot registered at 3079 fps. This is a difference of 50 fps.
The following range session, the very first shot in the rifle, also with a clean and cold bore, was 3001 fps. The next shot registered at 3084 fps. This is a difference of 83 fps.
This is actually a bit disconcerting and it appears I will have to start cleaning less aggressively. I am a stickler on keeping a bore clean between range sessions. I usually clean all carbon fouling completely and I have a really good workflow that will get pretty much all the black / grey carbon fouling out. But given that this particular barrel has such a muzzle velocity variance for a clean bore, I will have to leave at least some fouling in the gun.
I will be experimenting with this at the next range session. After my last range session, I hit the bore with WIPE-OUT Brushless (foaming) Bore Cleaner twice. I filled the bore with the foaming cleaner, let sit for one hour, and ran three dry patches. Then repeated. After that, I ran a oiled patch through the bore twice, followed by a dry patch. There is still fouling in the bore, and I will run a chrono test to see how the fouled / ‘dirty’ cold bore shot clocks on the Labradar, followed by a subsequent warm bore shot.
Barring any further shift in the muzzle velocities over the course of the next 50 rounds, I anticipate I will be hovering anywhere between 41.0gr and 41.3gr of H4350 with the Berger Bullets 6mm 105gr Hybrid Target in Lapua (necked down) 6.5mm Creedmoor brass.
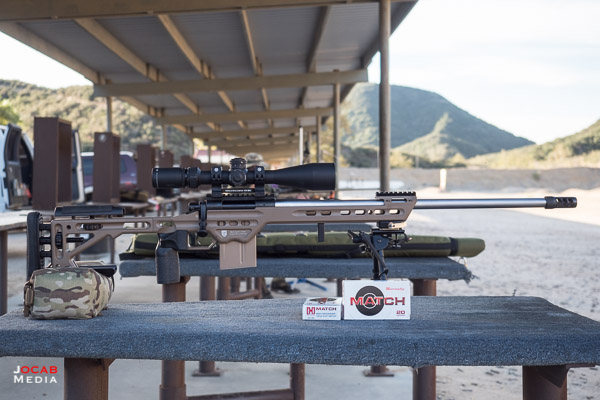
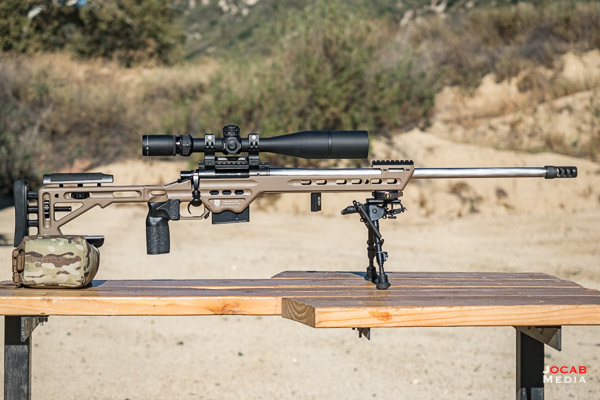
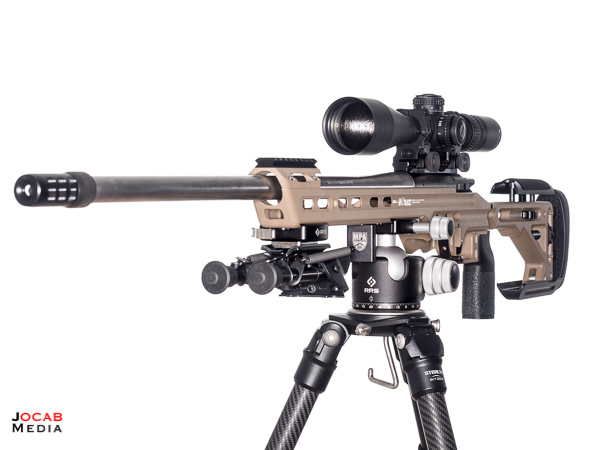
Let’s recap the current specifications for the completed build:
- American Rifle Company Mausingfield short action (with 20MOA rail)
- Bartlein 5R stainless steel 24″ length, 6mm (.237″ bore), 1:7.5″ twist, Remington Varmint contour chambered in 6mm Creedmoor (threaded for 5/8×24)
- Area 419 HELLFIRE Self-Timing Break
- Huber Concepts 2-Stage (1lb, 1lb) trigger
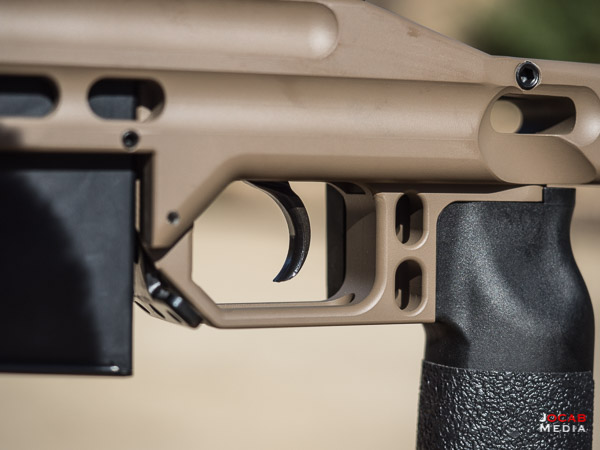
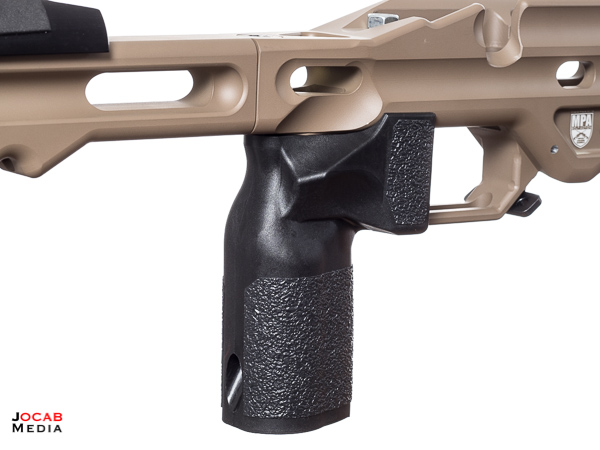
- Masterpiece Arms BA Competition Chassis in Flat Dark Earth (and with MPA Enhanced Bag Rider)
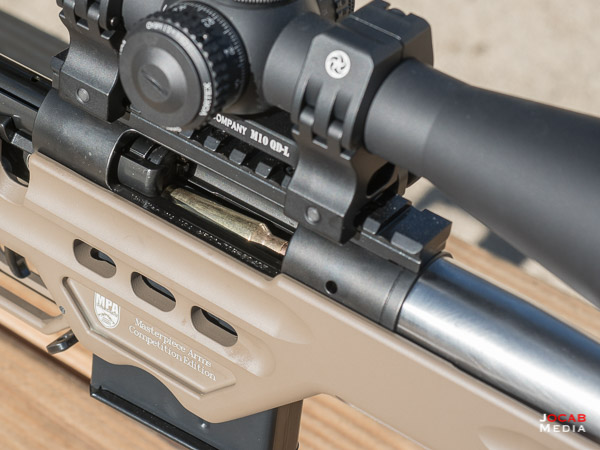
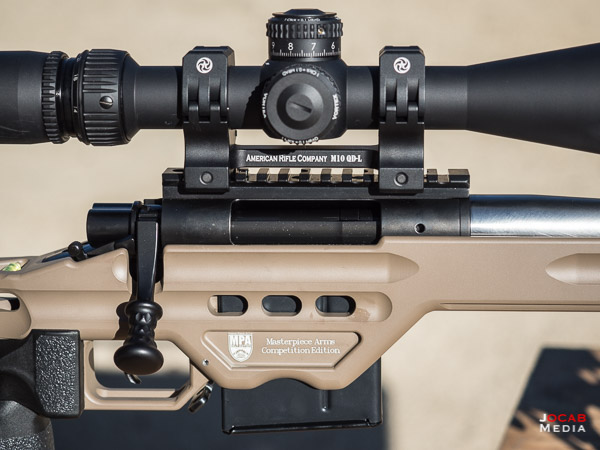
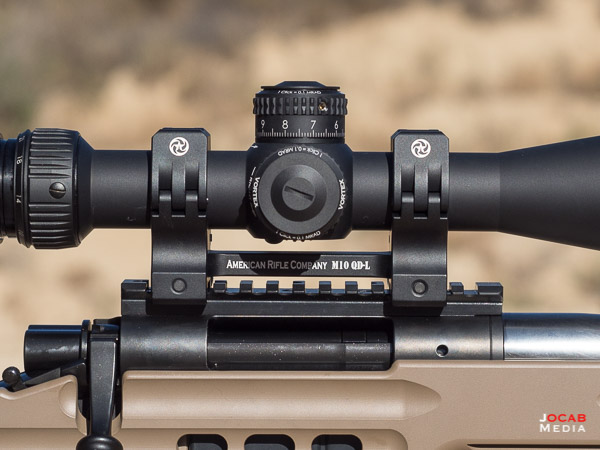
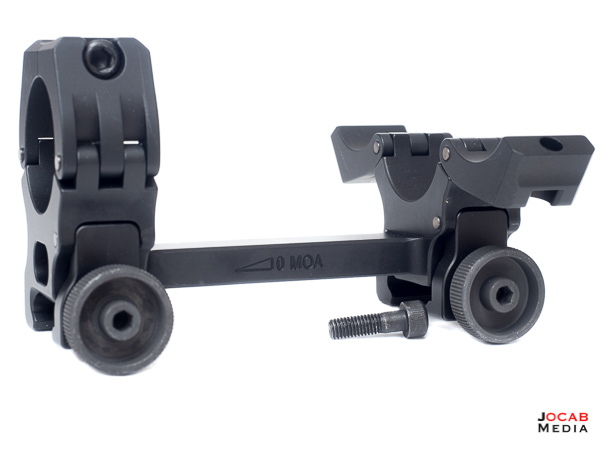
- American Rifle Company M10 QD-L 30mm tube, 35mm / 1.38″ tall, 0MOA mount
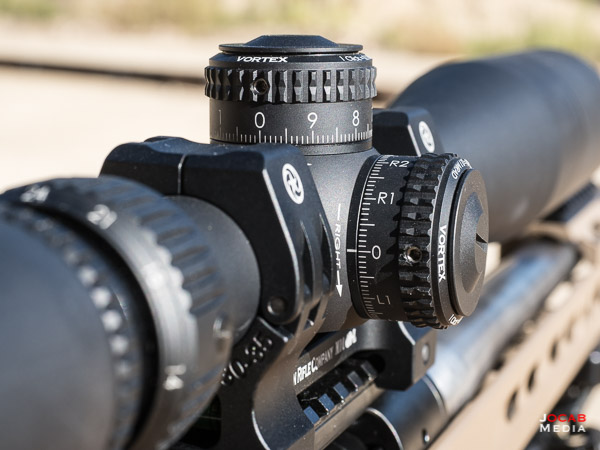
- Vortex Optics Razor HD AMG 6-24x50mm MRAD
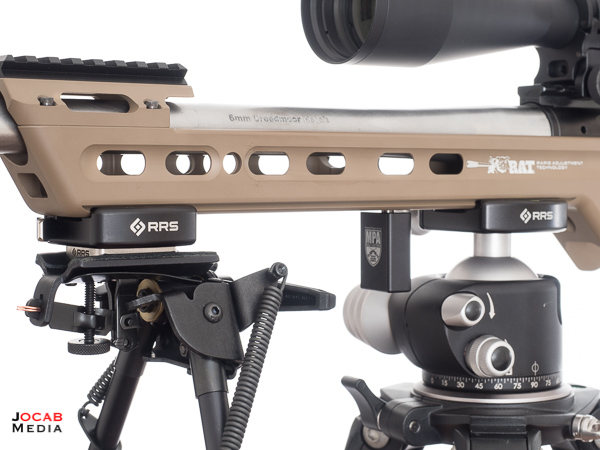
- Accessories – Harris Bipod with Really Right Stuff Adapter, MPA Enhanced Bag Rider
So what are my opinions of the components on this rifle as built?
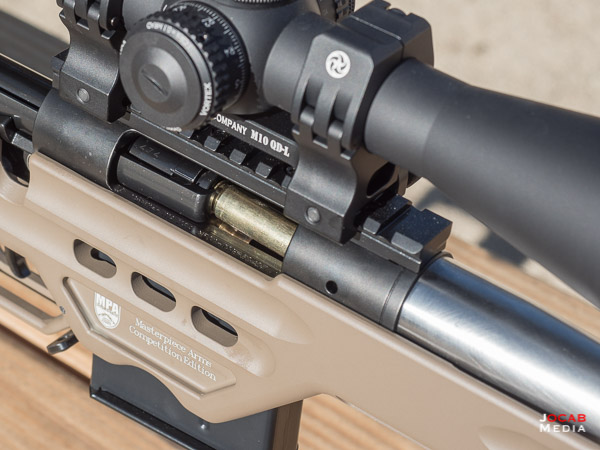
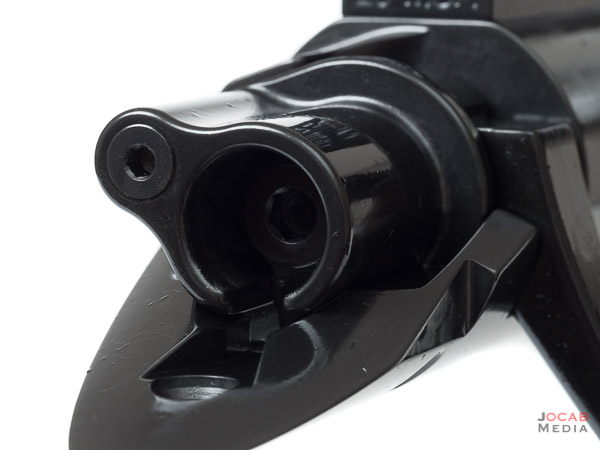
Action: The heart of the rifle is the action, and the American Rifle Company Mausingfield is definitely an interesting action. As I mentioned in a prior article, I chose the Mausingfield because of what I saw at SHOT Show 2017, and also on the impetus that I wanted to try something new. There are many custom Remington 700 footprint actions out there, but the ‘unique’ aspect of the Mausingfield made me want to build my 2017 rifle around this action.
The operation of the action is definitely different. From the batch of actions that mine was a part of, there was feedback from owners regarding the gun not-cocking on very slow operation of the bolt. There was also feedback that the bolt was difficult to close.
While I have not been able to induce the failure to cock on slow bolt operation, I did experience some bolt closure resistance initially.
But I think the first resistance issues I experienced were due to ammunition (rounds seated to long). Then I feel that the initial break-in of the rifle was the next factor in the resistance issues. As it stands now, I find the bolt to close without any issues as long as you put some minor forward force (towards the muzzle) as you begin the bolt closing operation.
This is a bit of a change in bolt manipulation compared to the traditional Remington 700 bolt action design. But with a controlled round feed bolt action, this is to be expected, especially when the cocking piece is retained by a plunger and spring that is compressed when the bolt is pushed forward to close.
So right now, the operation of the action itself is satisfactory at this point. The controlled feed / extraction is functioning well for me, and the Springfield-style ejector is kicking out the brass appropriately.
The integral recoil lug and the receiver bolt stop are common features in a custom action and are basically a must have.
Some people balk at the bolt handle due to the non-traditional design. I actually like it because it is optimized for those folks that open the bolt with a bladed hand as opposed to gripping the bolt handle with the thumb and fore/index finger (and maybe middle finger).
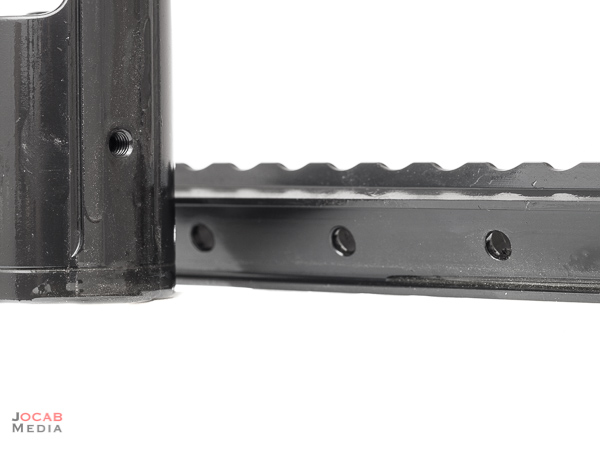
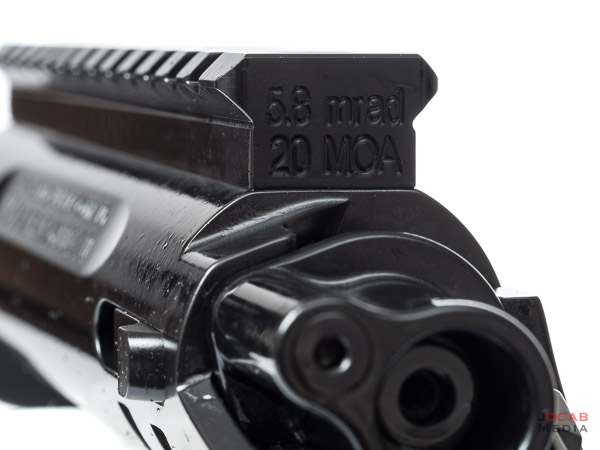
The non-integral scope base / Picatinny rail is a characteristic I would normally shy away from in a custom action, but when I saw how the American Rifle Company designed the Mausingfield and the corresponding base, I made an exception. The receiver is keyed for the scope rail, so it will actually press-fit and hold into place without the screws securing the rail to the receiver.
You can literally hold the action up by the rail itself, and the action will remain attached. The keyed receiver creates for a secure scope rail, while allowing the operator to change the inclination on the fly.
I went with a 20MOA rail, but if I felt so inclined I could take the scope off, remove the base, and replace it with a 30MOA rail. In combination with canted one-piece scope mounts, the operator can get quite creative on the inclination (e.g 20MOA rail + 20MOA mount).
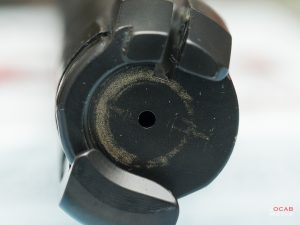
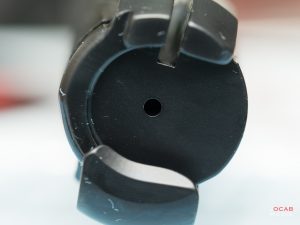
The DLC coating used on the Mausingfield is great. The surface areas run very slick, and if you a film of oil on things, it is even more buttery smooth. Furthermore, the DLC is wonderful when it comes to cleaning the action. Brass marks left on the bolt come off very easily. I actually will just use some of the excess WIPEOUT from the bore that exits the muzzle on the bolt face and bottom off the bolt body. I let that sit for several minutes and wipe it off with a shop rag and the brass marks come right off.
- Before
- After
All in all, the Mausingfield is a solid action and it definitely is an interesting option in terms of the custom Remington 700 footprint actions on the market.
Barrel: There is not much to say about the Bartlein 5R 6mm barrel. As far as cleaning, the copper fouling was heavier than I expected (based on blue coloring on patches during cleaning) early on. But after 100 rounds, the copper fouling has dropped off and it cleans quicker than before. I acquired this blank from Southern Precision Rifles (aka bugholes.com), and they only had .237″ bore on-hand. I did some research online, and found mixed opinions on whether .236″ or .237″ bores were better than one another. At this point, I cannot tell you if the .237″ is shooting worse than had I acquired a .236″ bore blank.
The 1:7.5″ twist rate is pretty much a must have for long range. In all honesty, if a 1:7″ twist was available on-hand, I probably would have picked that up because faster is better in my opinion, and I don’t plan on shooting anything under 100gr in this rifle. But 1:7.5″ will work with all the 6mm bullets out there right now.
Note: Berger Bullets indicates on their website that the 6mm 105gr Hybrid Target (#24433) has a recommended optimal twist rate of 1:7″. But I found text from Berger Bullets online that indicated this bullet will stabilize in a 1:8″ as long as the twist is a true 1:8″.
Regarding the contour, the Remington Sendero/Varmint contour is actually considered a good balance for weight and thickness/rigidity. In retrospect, I think I should have risked the slightly extra weight and gone with the M24 contour for a little more rigidity when heat comes into play. I might try an M24 contour the next time I rebarrel this rifle (or another rifle).
Unofficial weight for this rifle is right at 15 pounds (using a no-name hanging scale). This rifle tips the scale a bit more than I expected it would. I am not sure how much more weight an M24 contour would add, but maybe an extra half-pound would be negligible.
I feel the 24″ finished barrel length is a solid choice for this particular build. I used to be an advocate of the 26″ barrel length for a precision tactical bolt rifle. But I have changed my view and find the 24″ length to be a good balance of form factor (maneuverability) and muzzle velocity. With the brake attached, the 24″ barrel is just right in terms of balance, at least for me.
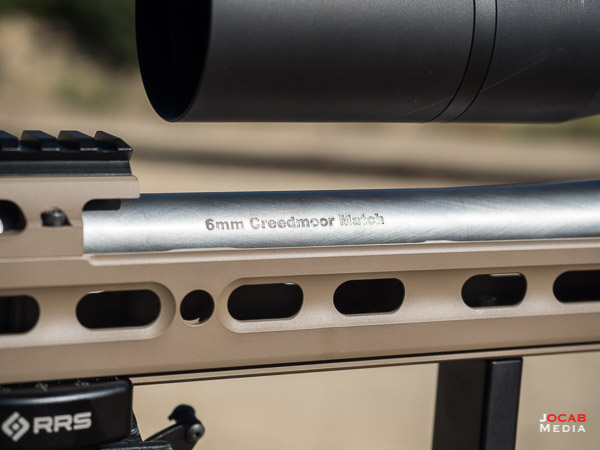
As far as the actual chambering, I really like the 6mm Creedmoor so far. It has a little more discernible recoil than my 6mmBR, but the velocities I can get with it should get me out to 1000 yards and beyond without issue. While it is a bit annoying that the current Hornady 6mm Creedmoor 108gr ELD Match factory ammunition is too long for my chamber, I would rather have it set up the way it is now. When I seat the Berger Bullets 6mm Creedmoor 105gr Hybrid Target at or just before the lands, the cartridge overall length is 2.790″ (+/- meplat variance). This is under the official 2.800″ magazine length and well under the practical AICS magazine length (~2.880″ depending on the magazine manufacturer). Thus, I have quite a bit of room to chase the lands before we hit the practical magazine length, assuming I even need to chase with the Berger hybrids.
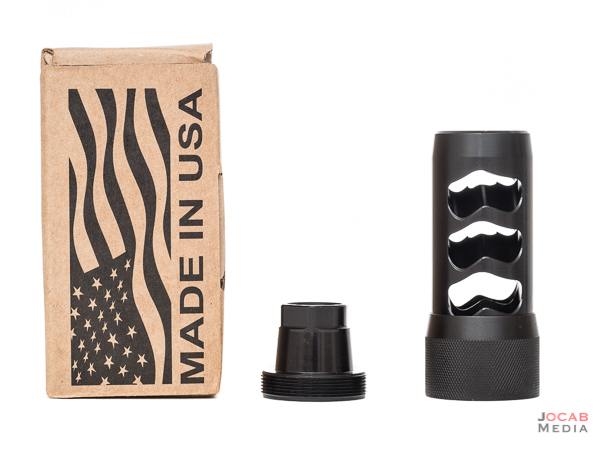
Muzzle Brake: The muzzle was threaded with 5/8-24 threads by the gunsmith that installed the barrel, for the mounting of the Area 419 universal adapter that the Area 419 HELLFIRE brake attaches to. The universal adapter is torqued true to the bore and never taken off the barrel.
The HELLFIRE brake is a quick attach/detach device and self-timing by the user. The primary reason why I wanted a removable brake is because I wanted the ability to remove it for venues where brakes are not permitted (e.g. F-Class). I was going to get the APA Lil Bastard Gen 2, which is was a popular quick attach/detach option. But I read some reports on run-out issues with this particular brake. I came across the Area 419 and investigated it to discover that the design mitigates run out (assuming the adapter itself is true to the bore).
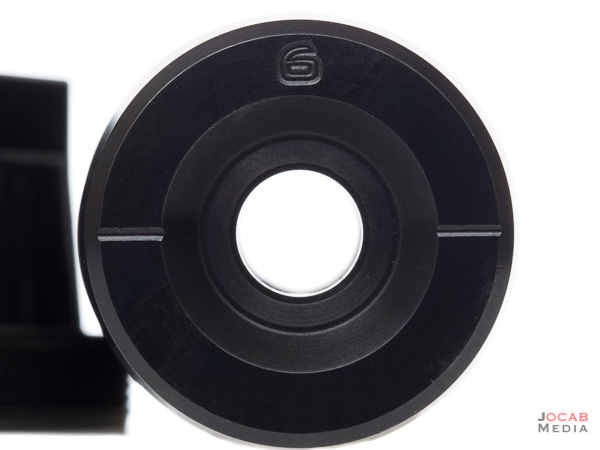
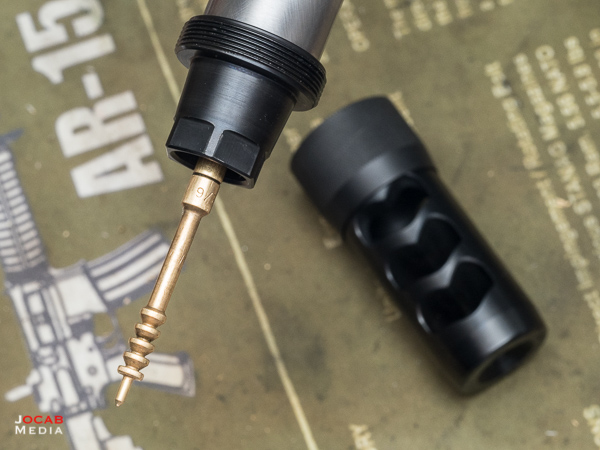
To install, simply (reverse) thread the collar on to the adapter until it gets close to tightening up. Turn / orient the brake so it is timed (use reference marks on face of the brake; number goes to 12 o’clock), and then hand-tighten the collar to lock it down. When done properly, the brake will not move / turn while the collar is tighten.
It is just as simple to remove. Simply loosen the collar and then pull forward on the brake to pop it away from the locking collar, and then completely unthread the collar. Excellent design.
I am quite enamored with this muzzle brake. Whenever I decide to install a muzzle brake on another rifle, I will be getting another Area 419 HELLFIRE.
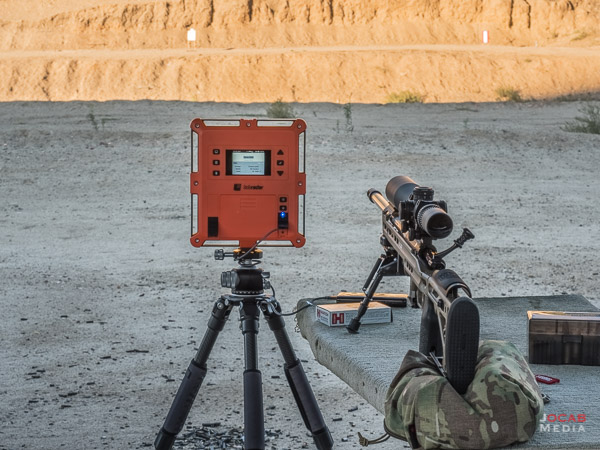
Noteworty information: The gases are emitted about 45 degrees to the rear, not to the sides. So take this into account when you are shooting next to someone or something (e.g. Labradar). When I was doing initial load testing with the Labradar, I had the Labradar on the bench via my tabletop mount, which places the Labradar about 6 inches behind the muzzle.
This is right in the path of the gases, and the pressure of the gases from each shot was enough to eventually turn the Labradar on the mount. This resulted in the Labradar eventually facing away from the bullet trajectory path, and causing me to lose some shot readings.
I eventually wised up and placed the Labradar on a tripod adjacent to the bench, so I could control the fore and aft placement of the Labradar relative to the muzzle (Labradar flush with the muzzle face).
Trigger: While I was initially going to get another TriggerTech single-stage due to the fact that the one on my Remington 700 in the ATAICS functions very well, I decided to go back to the 2-stage trigger format I competed with in Service Rifle for so long. I ended up going with a Huber Concepts instead of the more popular Timney Triggers. I elected for a 1lb first stage and 1lb second stage for an evenly split break. It is non-adjustable and is set when the trigger is made. The break on the trigger is perfect with zero creep, and there is minimal over travel.
My one complaint is that the first and second stage do not feel like they are even. The first stage definitely feels lighter and based on the spring style RCBS trigger pull gauge, the first stage is right around 12 ounces, give or take. The second stage appears to be slightly over 1lb, maybe 1lb and 2-3 ounces.
Of course, the trigger gauge isn’t perfect and I can’t get it to pull straight back due to the chassis and grip. But I do trust my finger and it does feel just slightly lighter on the first compared to the second stage. While the trigger itself is great in terms of the break and overtravel, I am going to see where I stand in the next couple of months on the actual pull weight.
Chassis: I already wrote a long discussion of the Masterpiece Arms BA Competition Chassis back in June when I received it. But I did want to mention that the gunsmith who barreled the gun indicated that he had to make zero modifications to the chassis to fit the action. The Mausingfield dropped in perfectly, the bolt handle and ejection port cleared the inlet, and even the screws did not have to be trimmed for length.
When I ordered the MPA BA Competition Chassis, I selected Remington 700 short action and in the notes stated Mausingfield. But as far as I know, MPA did not do any different inletting for this than any other Remington 700.
I am liking this chassis quite a bit, and it is definitely ahead of the ATAICS. The Accuracy International Chassis System was once the top chassis to get years ago, but the MPA (as well as other chassis systems from manufacturers out there) are leap frogging the ATAICS (as well as the AICS AX) in terms of design and features.
The grip feels so much better to me than the ATAICS in terms of comfort and ergonomics. The thumb shelf makes a world of difference for a straight-to-the-rear trigger pull.
The integration of an Arca-Swiss dovetail on the full length of the forend opens the door for accessory attachment options and flexibility, and the barricade stop is a useful addition.
The MPA BA Competition Chassis weighs in about one pound less than the ATAICS, and you can definitely feel the MPA simply feels thinner and less bulky. The skin of the ATAICS gives it that bulky feel.
My one regret for this chassis is the non-folding aspect. When I ordered the BA Competition Chassis, there was no folding option and frankly, I do not care about folding stocks in terms of storage form factor. But when I clean the rifle, I have to run the cheek piece all the way down so the cleaning rod can clear. With a folding stock like my ATAICS, I can simply fold the stock out of the way and not have to touch the cheek piece. It is a minor annoyance, but it is worth mentioning.
Scope: The scope and scope rings were the last two items I purchased, and on the outset of this project, I was actually considering getting the Kahles 624i. After much thought, I decided to get another Vortex Optics Razor HD AMG 6-24x50mm MRAD. I realized that I love the Razor HD AMG that sits on my Savage 10FP so much, that it made sense to buy another one.
This is simply a great scope for the price. While the 30mm tube and 50mm objective are reduced from the 34mm tube and 56mm objective being utilized on the higher tier scopes, I feel the reduction in weight and the smaller form factor are good tradeoffs, without sacrificing functionality and image quality.
I love the L-Tec turrets for fast and accurate zero stop settings and the Vortex Optics warranty is difficult to beat.
Scope Mount: After mounting the scope in the American Rifle Company M10 QD-L one piece, I realized how great the scope mount is. On the outset of this project, I was thinking of going with a Spuhr mount after putting one on my Remington 700 in the ATAICS. But I figured I would the ARC scope a try since I am using the Mausingfield, and it would be so fitting on have that scope mount on this action. Plus, the M10 QD-L has received a lot of high praise in the community.
This praise is well warranted and the scope mount rivals, if not exceeds the Spuhr ISMS in terms of quality and design. It is simpler than the Sphur in terms of screws, with only two screws to secure it to the rail, and one screw per scope ring. Yet the design of the M10 QD-L is such that a single screw per ring with 50 in-lbs of torque safely secures the scope in the mount.
Not to mention the butterfly open design mitigates scope rotation in the mount as the rings are tightened, helping to achieve a leveled reticle on install.
I wholeheartedly feel that I will opt for the American Rifle Company M10 QD-L the next time I need to buy a one-piece scope mount, over the Sphur ISMS or any other one-piece on the market.
I have been keeping project notes in a journaling notebook, with the costs incurred. Here is a cost breakdown of the final build at this point in time:
2017 Precision Rifle Project Cost Breakdown
| Part/Service | Make/Model | Cost |
|---|---|---|
| Action | American Rifle Company Mausingfield | $1600 |
| Barrel | Bartlein 5R 29" 6mm 1:7.5" Remington Varmint contour blank | $340 |
| Trigger | Huber Concepts 2-Stage | $295 |
| Chassis | Masterpiece Arms BA Competition Chassis | $915 |
| Muzzle Brake | Area 419 HELLFIRE Self-Timing Brake | $165 |
| Scope Mount | American Rifle Company M10 QD-L 30mm, 35mm height | $300 |
| Scope | Vortex Razor HD AMG 6-24x50mm MRAD | $2500 |
| Chassis Accessory | MPA Enhanced Bag Rider | $80 |
| Bipod | Harris Bipod S-BRM | $100 |
| Bipod Accessory | KMW Pod-Loc | $25 |
| Bipod Accessory | Really Right Stuff HC-Pro Harris Adapter | $85 |
| Gunsmithing | Installing barrel, chambering, and muzzle threading | $300 |
| TOTAL | $6705 |
People ask me for my opinions on products, especially since I am unbiased in the sense that I get zero manufacturer support in terms of sponsorship or endorsement compensations. I literally buy all my gear like every other regular consumer out there, with my own money. So I will use the following three ‘point’ scale:
- Strong Buy – One of the best in its product class. Maybe one or two other competing products that could rival it.
- Buy – Definitely worth buying, but you can find several alternatives in its product class that are just as good, and may better fit your tastes.
- Do Not Buy – Spend your money elsewhere. Either a very niche product or one of the weaker choices in its product class.
To summarize, if I were going to give ratings of the parts of my custom build, it would read as follows:
- American Rifle Company Mausingfield – Buy – Excellent action, but the realm of custom Remington 700 footprint actions is so diverse, that there are so many good actions to choose from.
- Bartlein 5R 6mm 29″, 1:7.5″ twist, .237″ bore, Remington Varmint contour blank – Buy – Great barrel, but there are lots of other quality barrels out there.
- Area 419 HELLFIRE Self-Timing Brake – Strong Buy – This brake is phenomenal in design. Felt recoil reduction while subjective, is more than satisfactory. Highly recommended, especially for those that want to remove the brake frequently. My next brake will be an Area 419 Hellfire.
- Huber Concepts 2-Stage trigger – Buy – Other than my personal issue with the discernible uneven split on the trigger pull weight as I requested, this is a solid trigger. Of course, there are other triggers for Remington 700 type rifles that you could go with an alternative based on your requirements.
- Masterpiece Arms BA Competition Chassis – Strong Buy – This is a bold statement, but I really like this chassis. I do not have much experience with other chassis systems, but this one is levels above the ATAICS, in my opinion. Not to mention, MPA is constantly evolving their chassis systems, making continuous improvements throughout the lifecycle of the product.
- American Rifle Company M10 QD-L – Strong Buy – Another bold statement. But many folks will agree that the ARC M10 is on par if not better than the Sphur ISMS. There are other one-piece mounts out there, but I feel the ARC M10 is a top-notch design. Then if you don’t want a one-piece mount, you can just get the ARC M10 two-piece scope ring set, which have the same vertical open design. When applicable, my next mount or rings will be ARC M10’s.
- Vortex Optics Razor HD AMG 6-24x50mm MRAD – Buy – I wanted to make this a Strong Buy, but the optics arena is filled with so many options. As much as I love this scope, and as much as I feel this scope offers one of the best cost to benefit ratios for a scope feature set, I concede that there are several other choices one could make and come out ahead in some regards.
Interesting Fact: This complete rifle build is 99.9% made in the United States of America. That ~0.1%? The reticle in the Vortex Optics Razor HD AMG. It is technically made in Germany.
As you can saw in the earlier cost break down, this project was not cheap. Frankly, I did not realize that the total cost of the rifle would be this high. Without the scope, the price is still $4200 ($3695 if you drop the scope mount/rings as well, along with the bipod setup). On the other hand, I was not trying to stay within any particularly budget.
But ~$4000 for a custom bolt rifle build is not unheard of, especially when you look at the high end customs from gunmakers like GAP and Surgeon, whose rifle packages start anywhere from $3000 and can go north of $6000, without a scope.
Anyway, this is most likely the end of this series of articles for this specific rifle project, unless I make a parts change or some. In the next several months after I put one thousand rounds down the barrel of this rifle, I will most likely write a status update on how this rifle is shooting and any changes or adjustments made to the rifle.
Be sure to subscribe to my YouTube channel for non-blog related updates on this rifle through my Range VLOG episodes.
Addendum: The following links are to the respective manufacturers websites for all the components and parts for this build, and the handloaded ammunition.
- American Rifle Company – http://www.americanrifle.com
- Bartlein Barrels – https://bartleinbarrels.com
- Huber Concepts – http://huberconcepts.com
- Masterpiece Arms – https://masterpiecearms.com
- Area 419 – http://www.area419.com
- Vortex Optics – http://vortexoptics.com
- Harris Bipods – http://www.harrisbipods.com
- Really Right Stuff – http://www.reallyrightstuff.com
- Berger Bullets – http://www.bergerbullets.com
- Hodgdon – https://www.hodgdon.com
- Lapua – http://www.lapua.com
- CCI – http://www.cci-ammunition.com

Alpha Munitions 6mm Creedmoor Small Rifle Primer Brass Review – ocabj.net
[…] above load is being run out of my current 6mm Creedmoor rifle built on the American Rifle Company Mausingfield action with a 24″ 1:7.5″ Bartlein […]