In early 2013, I got the impulse to add an updated 16″ carbine to my collection, so I ordered a Larue Tactical 16″ Stealth complete upper because I wasn’t in the mood to piece one together from parts. But with the high demand of firearms and related parts and accessories, the Larue upper was backordered for the unforeseeable future.
During the latter part of 2013 into early 2014, I eventually started to put together and completed an 18″ SPR-style AR-15, which caused me to cancel my order for the Larue upper.
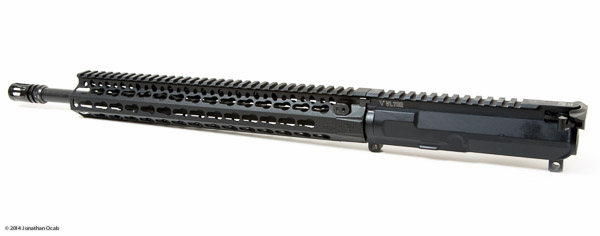
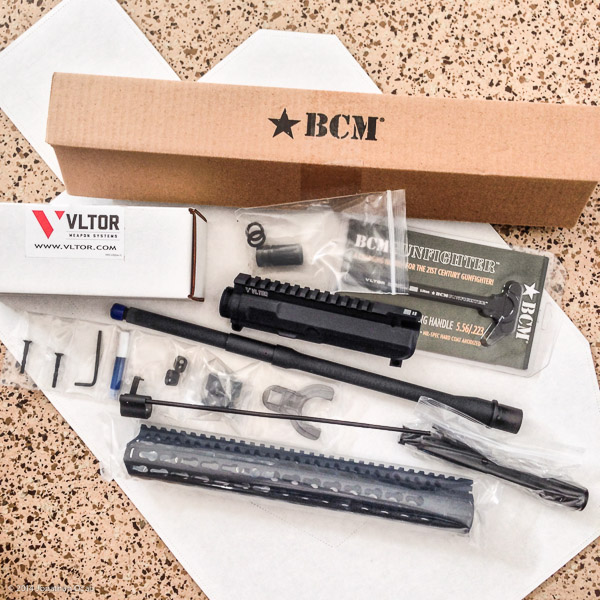
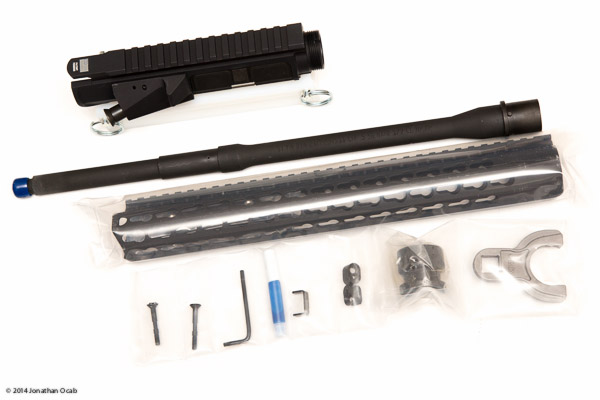
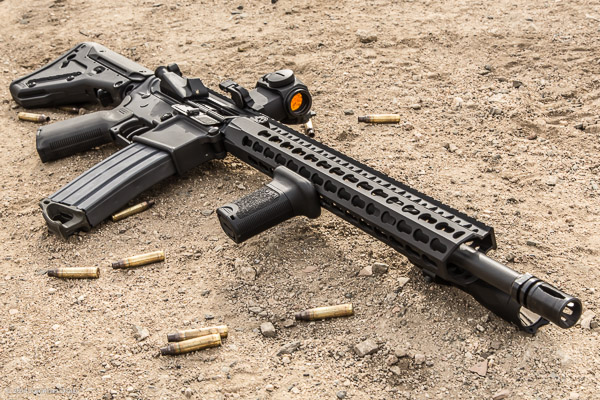
But after I got the SPR built, my desire for a 16″ rifle was rekindled when I picked up another VLTOR MUR-1A upper receiver for a good price from Midway USA. It was all downhill from there and I acquired the following parts to put together a 16″ upper:
- VLTOR MUR-1A upper receiver
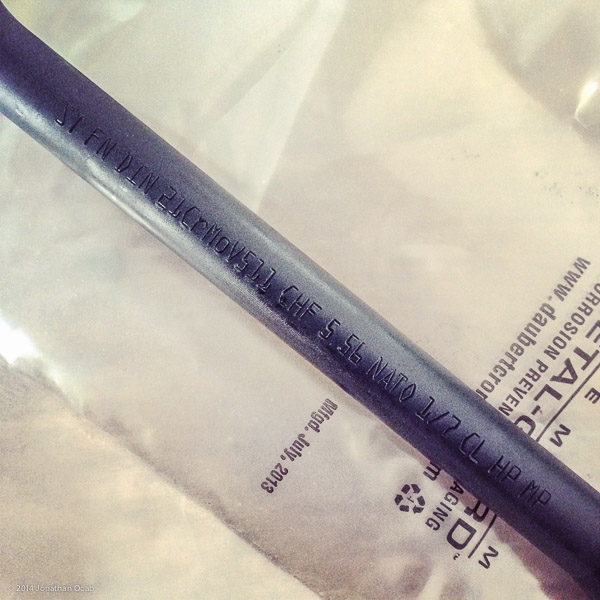
- Spikes Tactical (by FN) 16″ Mid-length 1:7″ Cold Hammer Forged, Chrome Lined barrel
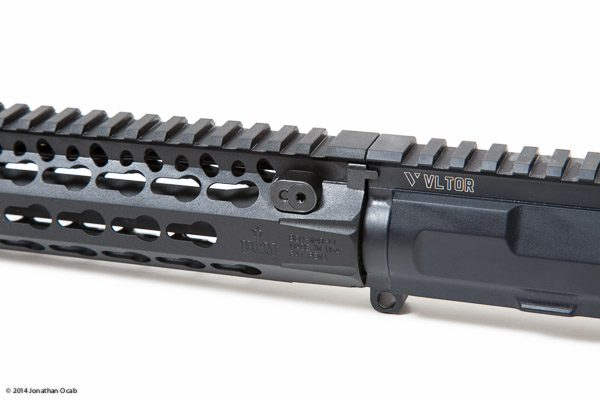
- Bravo Company USA / BCM 13″ KeyMod Rail (KMR) Handguard
- Spikes Tactical complete bolt carrier group
- Bravo Company low profile gas block
- Spikes Tactical melonite coated mid-length gas tube
- Bravo Company USA BCMGUNFIGHTER charging handle Mod 4
- Bravo Company USA A2 Flash Hider
I was going to use an existing Colt lower, but decided to go with some different furniture:
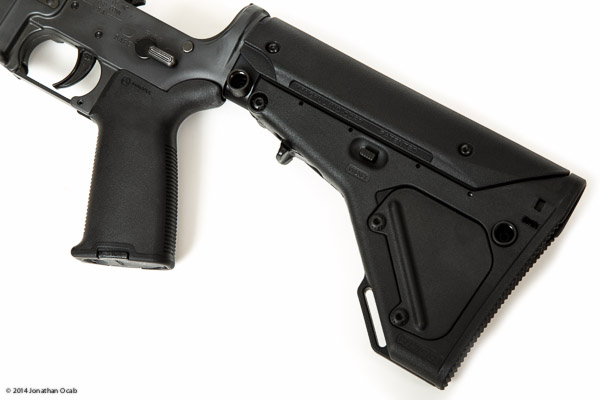
- Magpul UBR collapsible stock
- Magpul MOE Grip
My old Colt Sporter Lightweight was a solid gun for its time (mid to late 90’s) with a lightweight 16″ carbine barrel, fixed A2 carry handle upper, which was outfitted with an Aimpoint CompM2 4MOA on a forward carry handle mount. Of course, this was back before railed handguards and flat top upper receivers became the rage.
So I definitely wanted a 16″ build that was more in-line with current trends.
Mid-length gas systems are definitely the popular option for 16″ barrels because it was found that mid-length gas systems on the 16″ barrel length offered the best recoil / cyclical behavior without worrying about buffer weight.
Instead of going with a stainless steel 16″ barrel from White Oak, I decided to go with a cold hammer forged (CHF) barrel because I wanted something that would handle strenuous and continuous firing (heat). I love stainless steel barrels for their inherent accuracy (easier to cut quality rifling in stainless steel). But CHF with chrome lining will offer longevity with hard use.
I was going to get a Daniel Defense barrel, but when I saw Brownell’s carried FN barrels (manufactured for Spikes Tactical) in a 16″ mid-length configuration, I went that route. I figured an FN made barrel would be a quality barrel since FN is the primary small arms manufacturer for the US military (FN is contracted to produce firearms such as the M16/M4, M240, M249, and even the venerable M2 .50Cal Browning Machine Gun).
People often ask me why I always use 1:7″ twist barrels for the AR. I like to be able to shoot the heavier weight bullets. 75gr and 77gr BTHP bullets are the way to go for accuracy and performance in the AR when magazine length ammo is the limitation. 1:7″ is not too fast to shoot 55gr like USGI M193 ammo. It will still shoot fine and you won’t be in danger of spinning jackets off in mid-flight.
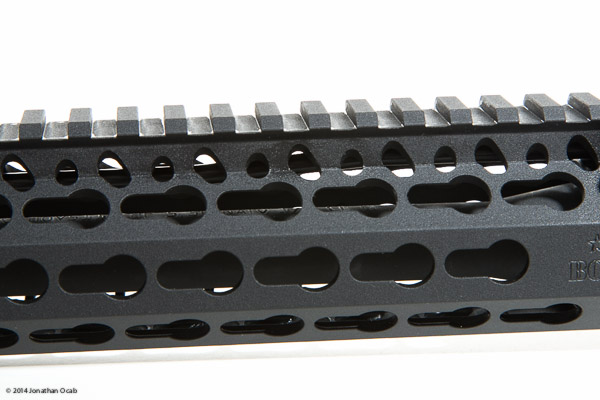
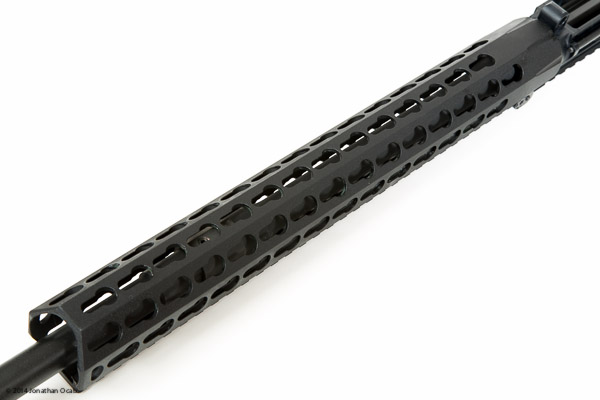
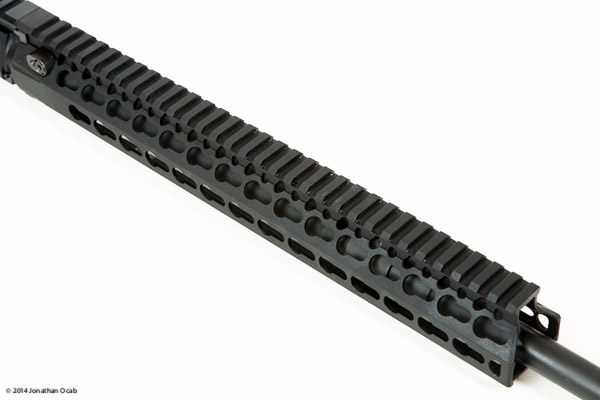
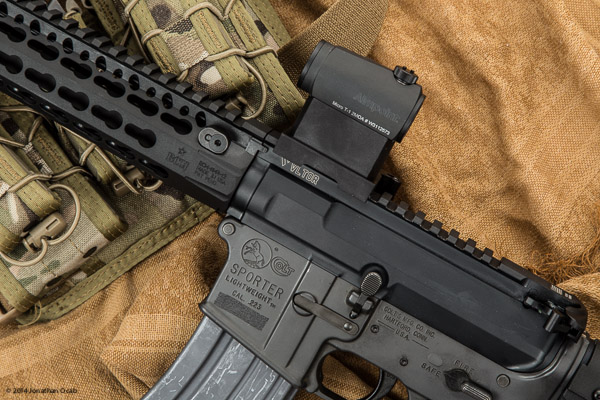
But the part that made this build on par with current trends is the BCM 13″ KeyMod Rail handguard. The KMR is a free floating railed handguard that utilizes the KeyMod universal interface system. Created by VLTOR, this was meant to offer a standard for rail accessory attachments that improves upon the Picatinny MIL-STD-1913 slot design.
Many handguard manufacturers have been producing non-quad rail handguards as of late. Instead of having Picatinny slots along the full length of the rail on all four sides (12 o’clock, 3 o’clock, 6 o’clock, and 9 o’clock), the handguard will only have Picatinny slots on the top, with small Picatinny rail adapters that can be installed by the operator on the desired side of the handguard to allow attachment of a grip, flashlight mount, etc. The Geissele SMR MK3 on my 18″ SPR build is one such example.
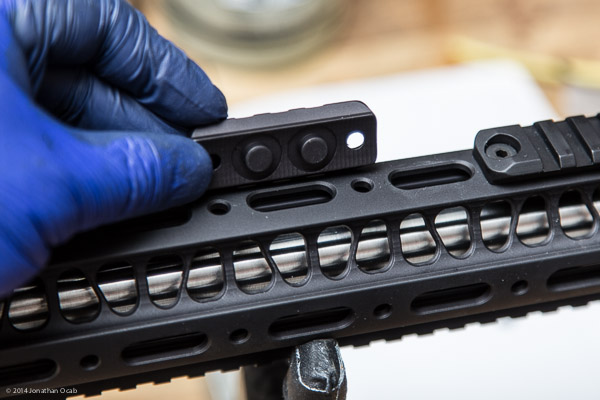
The reasoning behind the trend to move away from quad-rails is because quad-railed handguards are inherently thicker, especially when the operator installs handguard covers on the rails to cover the unused slots for better reaction hand grip. Thus, weight and size were saved by eliminating the Picatinny slots along the full length of the 9, 3, and 6 o’clock positions.
Adding Picatinny rail adapters onto a handguard to attach handguard accessories is less than ideal (more parts, adds gear height).
This is where the KeyMod system comes into play. The KeyMod is simply a fully defined specification that was made public, which is essentially a set of holes that can be cut into the handguard which doesn’t make the handguard thicker (as is required for Picatinny slots), but allows for accessories to be directly attached to the handguard (without adapters) if those accessories follow the KeyMod standard.
Since I already use a Geissele SMR MK3 handguard, I was going to get a 13″ Geissele SMR MK5 which is their Super Modular Rail with KeyMod. Unfortunately, Geissele has been out-of-stock on the MK5 for the past few months, and I was ready to build this rifle (all the other parts were available from a variety of vendors).
After much research, I decided to acquire an alternative: The Bravo Company USA / BCM KMR (KeyMod Rail) handguard in 13″.
From all the reviews and videos I found on the web, it appeared everyone that tried the BCM KMR was happy with the ruggedness and lightweight design of the BCM KMR.
When I finally got all the parts in hand, I threw it all together.
When I unboxed the BCM KMR, I was taken by surprise by how light the handguard is. As I mentioned before that I read remarks by other operators regarding the lightweight characteristic of the BCM KMR. But when handling it in person, the handguard is frightening light in weight (5.5 ounces for the handguard, 7.7 ounces total with the required mounting hardware).
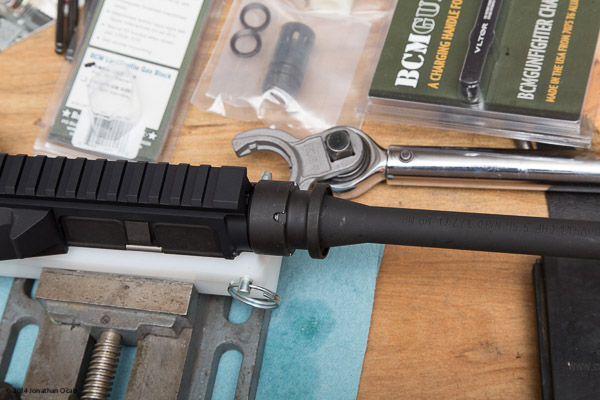
Installing an AR-15 barrel is a simple affair. Insert it into the upper receiver, put on the barrel nut and tighten it down (and torque to spec if applicable). I used the BCM KMR barrel nut since like most free floating handguards, the BCM KMR has its own proprietary barrel nut.
The only ‘difficult’ part of the upper assembly was sliding the actual BCM KMR handguard onto the barrel nut. The instructions indicate that the fit between the inner diameter of the handguard and the barrel nut will be tight, and I found that to be an accurate statement. I applied a thin gloss of oil on the outer surface of the barrel nut and had to slowly tap the handguard with a nylon mallet to get it to set into place.
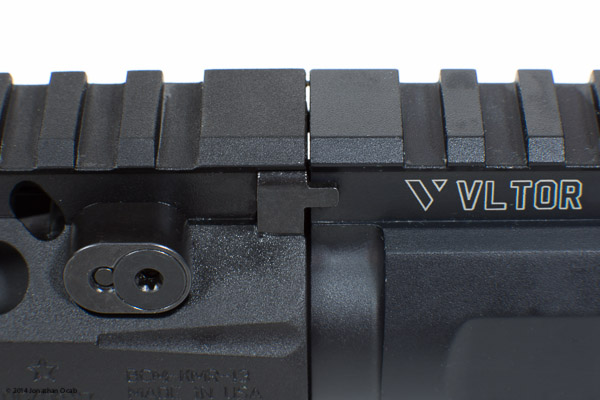
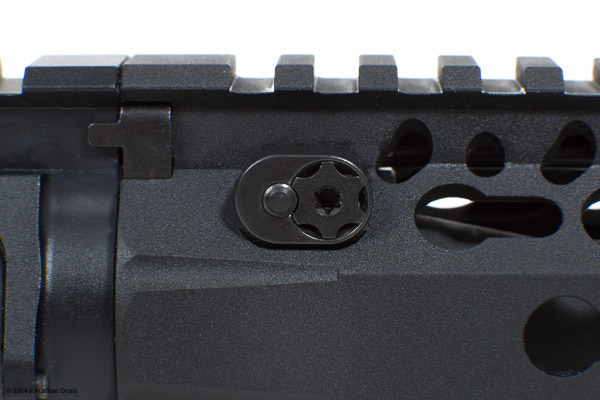
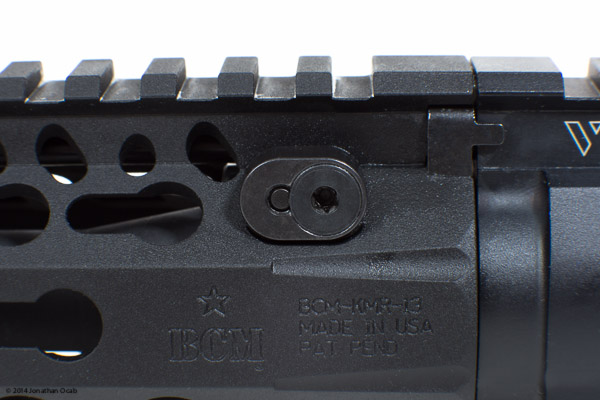
During the installation of the handguard, it is kept in alignment by a thin piece of metal called the index plate, which is placed between the handguard and the upper receiver and remains installed after assembly. This index plate is also what keeps the handguard from rotating during use.
I had mixed feelings about this ‘anti-rotation’ method at first, especially compared to the anti-rotation design of the Geissele SMR. But after pondering the BCM KMR design, I feel that it is a simple, effective way to tackle the problem of free-floating handguard rotation.
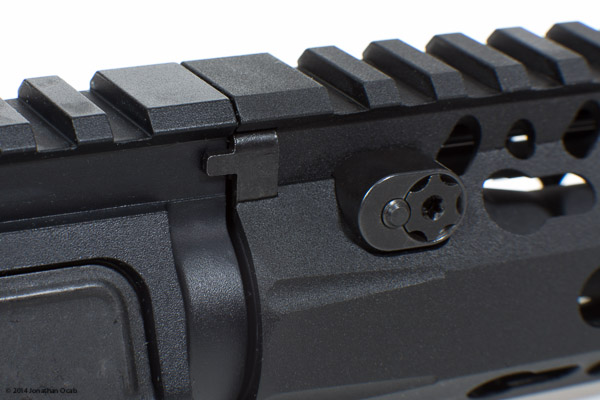
The BCM KMR is locked into place using an interesting cross bolt design. Two cross bolts are inserted on opposing sides of the handguard, but one cross bolt actually fits through the head of the adjacent cross bolt. Thus, one cross bolt actually prevents the other from loosening itself out.
Of course, if the one specific cross bolt that goes through the head of the other actually loosens up, the other one could loosen up. But this design serves as a backup to the standard use of Loctite (or other threadlocking material).
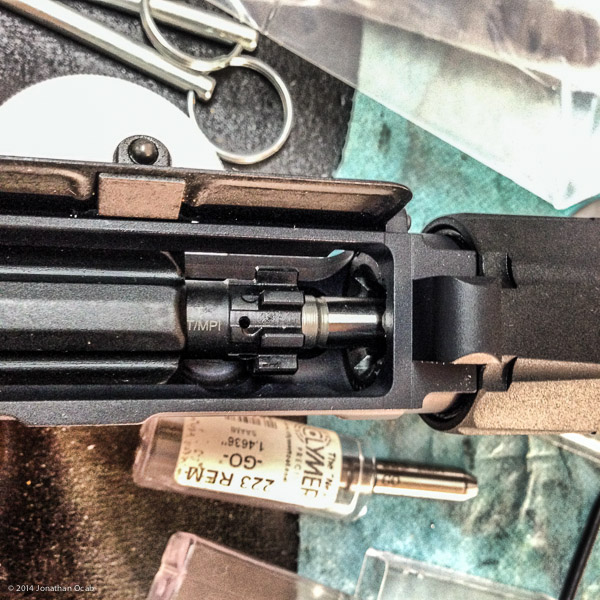
After checking the headspace (and verifying it passed), I finished off the rest of the parts installs, specifically the A2 flash hider and the lower furniture.
As far as the Magpul lower furniture, I was thinking about getting a ‘classic’ 4-position collapsible stock, but then looked into the Magpul options and was deciding between the ACS and UBR. The UBR is widely considered to be a great stock, tough and rugged, but heavy compared to most every other adjustable length stock. I decided to get the UBR because I wanted to rugged characteristics, and was willing to accept the weight characteristics and am favorable for a rifle that balances more to the rear than the front.
I chose the Magpul MOE grip simply because I wanted to replace the USGI A2 grip which isn’t all that comfortable for dynamic use.
This leads to the optic system. This 16″ build is meant to be a tactical / dynamic ‘carbine’ platform. This means an emphasis on extremely fast target engagement at CQB distances out to short range distances (200 to 300 yards). Thus, a red dot optic is my ideal choice. I had an Aimpoint CompM2 that I sold off awhile back when I began my competitive Service Rifle tenure. I was pondering the Aimpoint CompM4s which can be considered the current ‘revision’ of the CompM-series of optics.
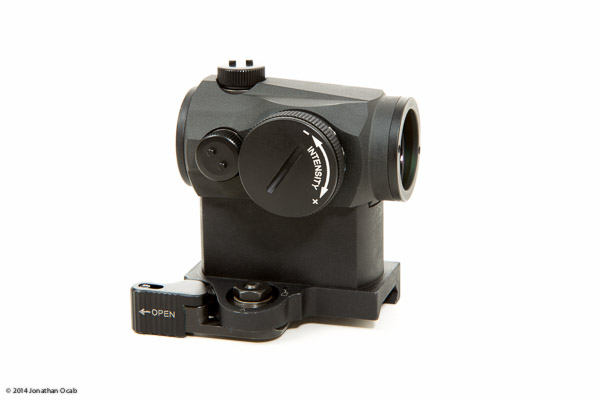
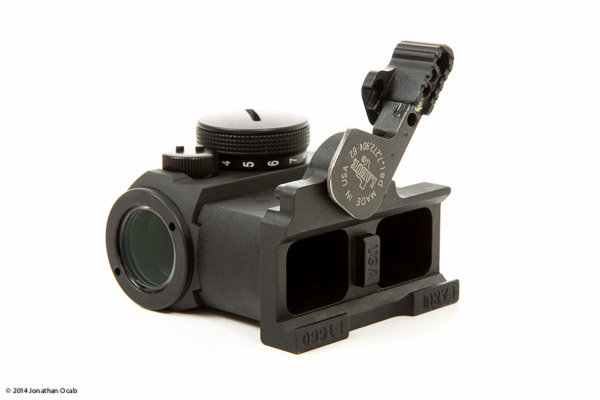
I then looked into the Aimpoint Micro T-1, Aimpoint’s venture into ‘micro’ red dot sights (MRDs). MRDs are meant to offer a red dot sighting system in smaller, lighter weight form factors. MRDs would seem to be better deployed as backup sighting systems to a magnified telescopic sight (scope) or for pistol applications. But the Micro T-1 has been widely adopted as a primary red dot sighting system for rifles.
After much consideration, I opted for the Micro T-1 with a Larue Tactical LT660 mount. While the lighter weight of the Micro T-1 compared to the CompM4s is a benefit, I was intrigued with using a red dot system with a minimal, simpler tube form factor and design. The CompM-series is definitely a bulkier red dot system.
With the rifle fully assembled, I wanted to take advantage of the KeyMod system. The two accessories that seemed like a practical way to employ the KMR are a handstop or foregrip and a weapon light mount.
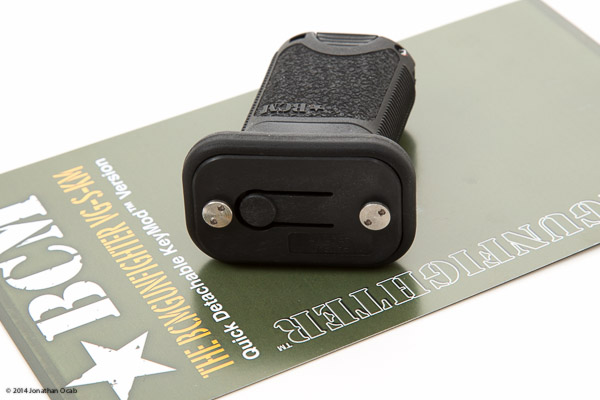
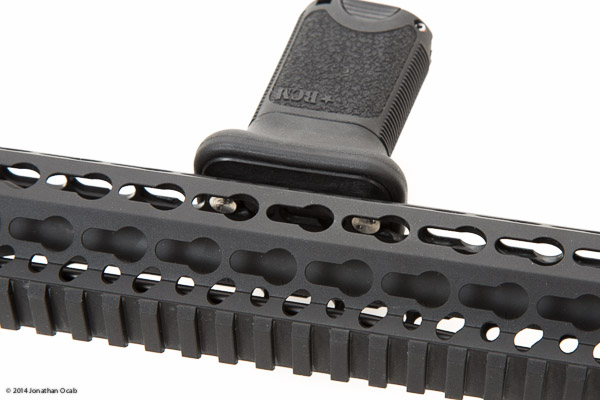
I was looking around at the various KeyMod handstops and none of them looked appealing. I decided to get the BCM short vertical foregrip. It’s short enough to not get in the way like a traditional length vertical foregrip, but offers me a platform by which to index my reaction hand when placing it on the handguard and enough material to control the lateral movement of the weapon platform.
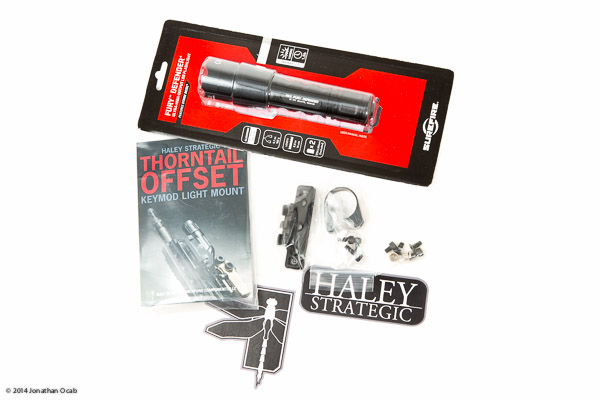
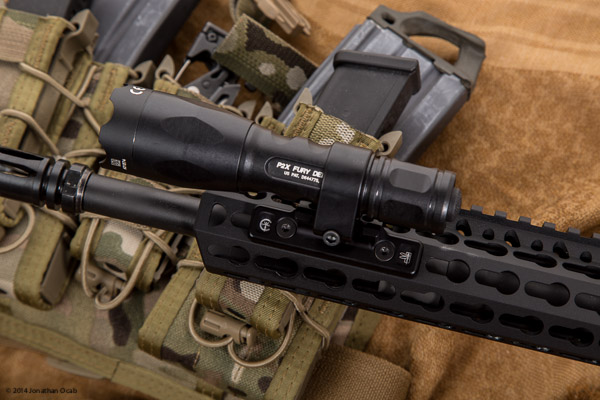
As far as the light mount, I went with a Haley Strategic Thorntail offset mount for KeyMod systems. It’s basically an adapter that connects to the KeyMod slot/hole, and the adapter has a 1″ ring (also available in different diameters) to hold a (handheld) flash light. I deployed the Thorntail with a Surefire Fury P2X Defender which is a 500 lumen LED with a strike bezel. I picked the Defender for it’s high output and the strike bezel which can serve as a gripping surface when driving the light into a barrier (e.g. window or door frame, side of wall) to rest and stabilize the rifle in an engagement.
Well, that certainly is a lot of equipment, isn’t it? So how does it shoot?
After a short sight-in / break-in / chronograph session, it shows no issues. Although, this build shoots my 75gr Hornady BTHP and 24.0gr RL15 load a little slower than I expected.
1. 2573 fps
2. 2588 fps
3. 2588 fps
4. 2593 fps
5. 2604 fps
Average Muzzle Velocity: 2589.2 fps
I was hoping for it to shoot solid 2600fps with 75gr (and 77gr) rounds. But this isn’t a big deal. A weak 2600fps average still means 600 yards is reachable with decent performance.
I also chronographed some Samson 55gr FMJ 5.56 NATO factory ammo, which is commercially branded IMI (Israeli Military Industries). This ammo is not NATO cross stamped, but the consensus is that it is most likely in-line with M193 / SS109 performance.
1. 3216
2. 3184
3. 3180
4. 3218
5. 3179
Average Muzzle Velocity: 3195.4 fps
This is actually a bit hotter than I would expect for NATO 55gr FMJ out of a 16″ barrel. Perhaps the Samson / IMI is loaded hot. But the brass doesn’t show much in terms of over pressure signs.
The rifle handles well, but I have yet to test it at 200 yards. I have no doubt that this rifle will shoot fine at short and mid-range distances.
As far as tactical / dynamic carbine manipulation, I still need to put in my repetitions. After years of Service Rifle and no emphasis on practical rifle shooting, my skill set needs to be improved upon.
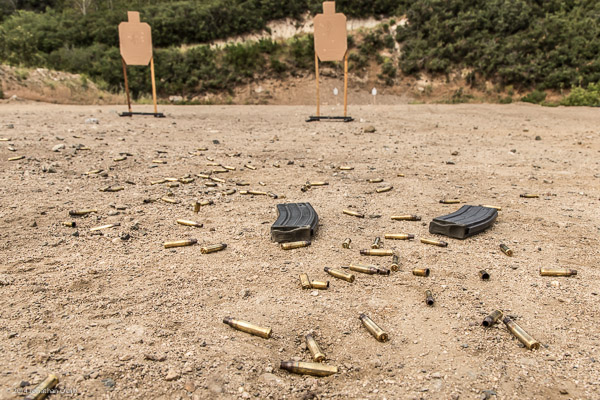
The parts used for this build were purchased from the following vendors:
- Brownells – FN / Spikes Tactical 16″ mid-length barrel, BCM KMR handguard, melonite gas tube, BCM low-profile gas block.
- Midway USA – VLTOR MUR-1A, Magpul UBR Stock, Magpul MOE grip
- Bravo Company USA – A2 FH and crush washer, BCM short vertical foregrip, carbine buffer and spring
- Haley Strategic – Thorntail Offset Mount for KeyMod
- G and R Tactical – Aimpoint Micro T-1 and Larue Tactical LT660 combo
- Amazon – Surefire P2X Fury Defender
I’d like to close out this article with a photo of model Chrissy Marie showing off this specific rifle along with the HSGI Leg Rig V1, or better known as the Costa Leg Rig, which I will also be doing a write-up on in the near future.

Model Depicted: Chrissy Marie.
Model Mayhem Profile: http://www.modelmayhem.com/1224167
Twitter: @Chrissy_Marie89

MisterPo
Excellent Build! Any plans on adding back up iron sights?
ocabj
I’ll eventually add BUIS, but I’m not in any real hurry to get some. I would like one that adjusts similarly to an A2 service rifle rear sight (elevation and windage, clockwise for up/right). The KAC sights look good.
Butch Peyton
Great looking build! Did the Spikes barrel come pre drilled for the GB set screws?
ocabj
Negative. No indentations for the gas block set screws. I drilled them myself. Only took a few minutes.
Blue Force Gear Vickers Combat Application Sling (VCAS) Review | ocabj.net
[…] up a Blue Force Gear Vickers Combat Application Sling in Multicam for use with my most recent AR-15 16″ mid-length build. The Vickers Combat Application Sling, or VCAS, is a two-point sling that was designed by both […]
TopS
How much does this build weigh?
The State Of The Rifle – December 2015 | ocabj.net
[…] I built what is currently my primary home / self defense and general purpose range rifle, my 16? Midlength AR-15. Since it’s nearing the end of the 2015 year, I figure it would be an interesting exercise to do […]
The State Of The Rifle – December 2015 – ocabj.net
[…] I built what is currently my primary home / self defense and general purpose range rifle, my 16″ Midlength AR-15. Since it’s nearing the end of the 2015 year, I figure it would be an interesting exercise to […]